
Thin brush painting can change a simple image into a convincing work of art. A sharp highlight in an eye, a narrow tree branch, or a clean edge around a miniature figure may occupy only a few millimeters. Yet that small mark can decide whether the whole painting feels precise or unfinished.
Many artists blame their hands when fine lines become shaky, broken, or too thick. In practice, the problem often comes from several connected factors. These include the brush shape, paint consistency, paper surface, hand position, and timing. This guide explains how to bring those elements together. It also shows how to build reliable brush control through focused practice.
Why Thin Brush Painting Feels More Difficult Than It Looks
Fine detail work leaves little room for error. A broad brush stroke can hide a minor change in pressure. In contrast, a thin stroke records almost every movement of the hand. Paint may also dry inside a very small brush before the line is complete.
The smallest brush is not always the best choice. A tiny brush may have limited paint capacity. This forces you to reload it constantly. A well-shaped detail brush with a slightly fuller body can hold more color. At the same time, it still ends in a sharp point. This balance is valuable for botanical veins, miniature painting, lettering, fur, and controlled outlines.
The painting surface matters just as much. Rough paper interrupts a narrow line. A smoother sheet allows the brush to travel with less resistance. Artists can review different painting paper and medium options before matching a surface to their technique.
Choose the Right Brush for the Mark
A brush should be selected according to the required mark. It should not be chosen simply by its size number. Hair length, spring, belly, point, and paint capacity all influence the result. Before starting an important area, test the brush on a spare sheet. Use the same paint mixture and pressure.
The following brush types support different forms of thin brush painting. Knowing their strengths prevents artists from forcing one tool to perform every task.
Detail Brush for Short, Controlled Marks
A detail brush usually has short hair and a narrow point. The shorter length gives the artist direct control. This makes the brush useful for eyes, small highlights, tiny petals, miniature features, and careful corrections.
Load only the front part of the brush. If paint reaches the ferrule, the hairs may spread. They can then release excess color. Place the point on the surface gently. Pull the stroke toward your body. Then lift the brush before the line becomes heavy.
A detail brush works best when:
- The stroke is short or highly curved.
- Precise placement matters more than paint capacity.
- The artist needs to stop and restart frequently.
- The design contains dots, corners, or tiny highlights.
Liner Brush for Long Fine Lines
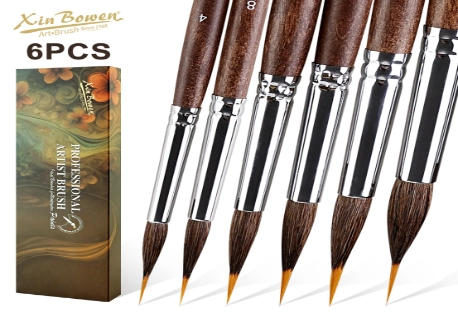
A liner brush has longer hairs. It can carry more diluted paint. It is designed for continuous lines such as stems, whiskers, hair, cables, branches, decorative borders, and flowing signatures. Our long-point brushes are available in different sizes for varied line widths and controlled applications.
The longer tip needs freedom to move. Holding it too close to the ferrule often creates tension. Instead, relax your fingers, keep the handle at a lower angle, and guide the movement from the wrist or forearm. Browse our wider artist paint brush collection when comparing liner, watercolor, and fine paintbrush forms.
Prepare Paint for Smooth Fine Lines
Even a high-quality brush cannot carry paint that is too thick, dry, or unevenly mixed. Paint consistency should be adjusted before the brush reaches the artwork. The goal is a mixture that flows from the point without flooding the surface.
Watercolor should form an even bead and move freely. Acrylic paint often requires a small amount of water or a suitable medium because it dries quickly. Oil paint can be loosened carefully, but excessive medium may weaken coverage or cause the line to spread.
Test Paint Flow Before Every Detailed Area
Make several trial strokes on matching paper. A good mixture should create a clear line without gaps, blobs, or a heavy mark at the end. If the line breaks, add a small amount of liquid or load the brush more fully. If it spreads, reduce the liquid and remove excess paint from the brush.
Use this quick test:
- Draw one straight line without reloading.
- Paint a slow S-shaped curve.
- Change from light to moderate pressure.
- Add five equal dots.
- Check the back of the paper for excess moisture.
These marks reveal paint flow, point quality, pressure control, and surface response within seconds.
Match Paper Texture to the Desired Detail
Paper is an active part of the painting process. Its fibers control how moisture spreads, how strongly pigment settles, and whether a fine line remains complete. Choosing the wrong surface can make good brush control appear weak.
Smooth paper generally supports crisp illustration, small lettering, and controlled fine lines. Medium-textured watercolor paper offers a balance between detail and natural pigment movement. Rough paper creates broken, lively marks that suit bark, grass, stone, and dry-brush effects.
Consider Paper Weight and Moisture
Light paper can buckle when it receives repeated washes. Once the surface becomes uneven, a thin brush may touch the raised areas and miss the lower ones. Heavier watercolor paper provides a more stable working surface for layered detail.
Xin Bowen supplies watercolor pads in options such as 200gsm pure wood-pulp paper and 300gsm mixed-cotton paper. Artists can choose A5, A4, or A3 formats according to practice needs and finished work. Our broader product selection also connects paper with brushes, paints, palettes, and drawing tools.
For controlled thin brush painting:
- Use smoother paper for clean outlines and miniature studies.
- Choose heavier paper for wet layering.
- Let washes dry before adding sharp details.
- Test unfamiliar paper before beginning finished artwork.
- Keep a clean sheet under the painting to protect its surface.
Build Better Brush Control Through Body Position
Brush control begins before the stroke. A tense shoulder, unsupported wrist, or unstable painting surface can create unwanted movement. Sit at a height that allows the forearm to move freely. If possible, angle the artwork slightly rather than bending closely over a flat table.
Rest the side of your hand on a clean support area. For miniature painting, bring both hands together so that they steady each other. Breathe out slowly as you make a difficult line. This simple habit reduces sudden movement caused by holding your breath.
Use Pressure to Change Line Width
Thin lines require very little pressure. Begin with the point, add pressure gradually for a wider section, and lift slowly to return to a fine end. Do not push the hairs forward. Pulling the brush allows them to remain aligned.
Practice three forms:
- Tapered lines: Touch, press slightly, pull, and lift.
- Parallel lines: Keep pressure and speed consistent.
- Curved lines: Rotate the paper instead of twisting the wrist shar
Ten minutes of daily brush control practice is more useful than one long session followed by several weeks without training.
Prevent Common Thin Brush Painting Problems
A broken line may come from rough paper, dry paint, insufficient loading, or excessive speed. A thick ending often means the brush stopped on the surface instead of lifting while moving. Shaky lines usually result from tension or an unsupported hand.
When a stroke goes wrong, identify the cause before painting over it. Repeated correction can damage watercolor paper or create a raised acrylic surface.
Common solutions include:
- Line becomes wider: Reduce pressure and remove excess paint.
- Line stops halfway: Improve paint flow or use a brush with a fuller belly.
- Brush point splits: Reshape the wet hairs and clean dried paint near the ferrule.
- Color spreads: Work on dry paper or use a less diluted mixture.
- Paper fibers lift: Stop scrubbing and allow the surface to dry.
- Acrylic dries on the brush: Rinse frequently and mix smaller paint amounts.
Clean water-based paint from brushes with mild soap and lukewarm water. Reshape the point and dry the brush horizontally. Never leave a detail brush standing on its tip.
Create a Focused Practice Tutorial
Random marks help with warming up, but a structured exercise develops skills faster. Divide a sheet of watercolor paper into four sections. Use the same brush and color throughout so that you can clearly compare your results.
Complete the following exercises:
- Paint twenty lines from thick to thin.
- Connect ten dots with continuous curved strokes.
- Paint a small leaf using one outer line and one center vein.
- Add branches to a miniature tree without retracing them.
- Repeat the exercise with less pressure.
- Record the brush, paint ratio, and paper type.
Afterward, circle the three cleanest marks. Study what they share: speed, angle, pressure, or paint load. This turns practice into useful evidence rather than simple repetition.
At Xin Bowen, we develop art materials for students, hobby painters, artists, and wholesale buyers. Our products include fine brushes, liner brushes, watercolor pads, paints, sketching tools, and complete painting sets. We also provide one-stop art material services covering product support, design, quality inspection, packaging, and transportation.
Conclusion
Advanced thin brush painting is built through careful choices and repeatable habits. Start with a brush that has a sharp point and enough paint capacity for the intended mark. Adjust paint until it flows cleanly, then test it on the same watercolor paper used for the finished work. Support your hand, relax your grip, and pull each stroke instead of pushing the brush.
Progress does not depend on painting hundreds of perfect lines in one session. Short, focused practice gives better results. Compare your marks, identify the cause of each problem, and change only one factor at a time. With steady brush control, suitable paper, and proper brush care, fine lines become more predictable. Detail then serves the artwork instead of becoming a source of frustration.
FAQs
Q: What brush is best for thin brush painting?
A: A pointed detail brush suits short marks, while a liner brush works better for long fine lines.
Q: Is 200gsm watercolor paper suitable for detail work?
A: Yes. It suits controlled practice, but heavier paper handles repeated wet layers more effectively.
Q: Why does my liner brush create broken lines?
A: The paint may be too dry, the brush underloaded, or the paper surface too rough